Page 2 of 16
Posted: Wed Feb 09, 2011 4:31 pm
by Cameron_z6a_N.S.
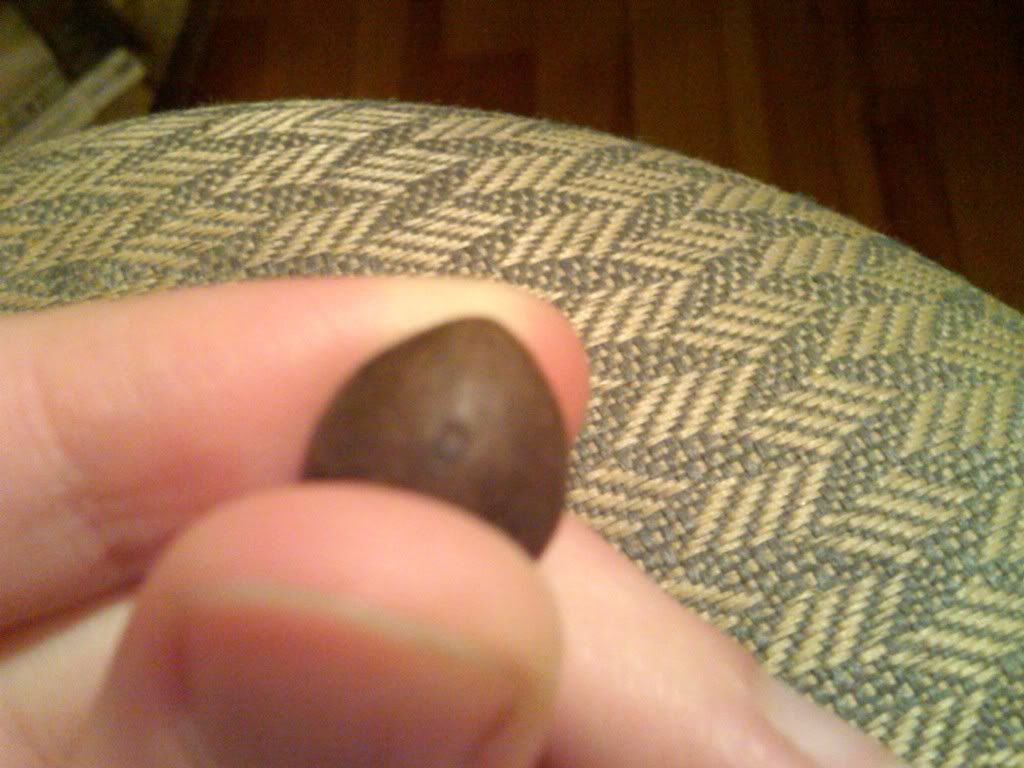
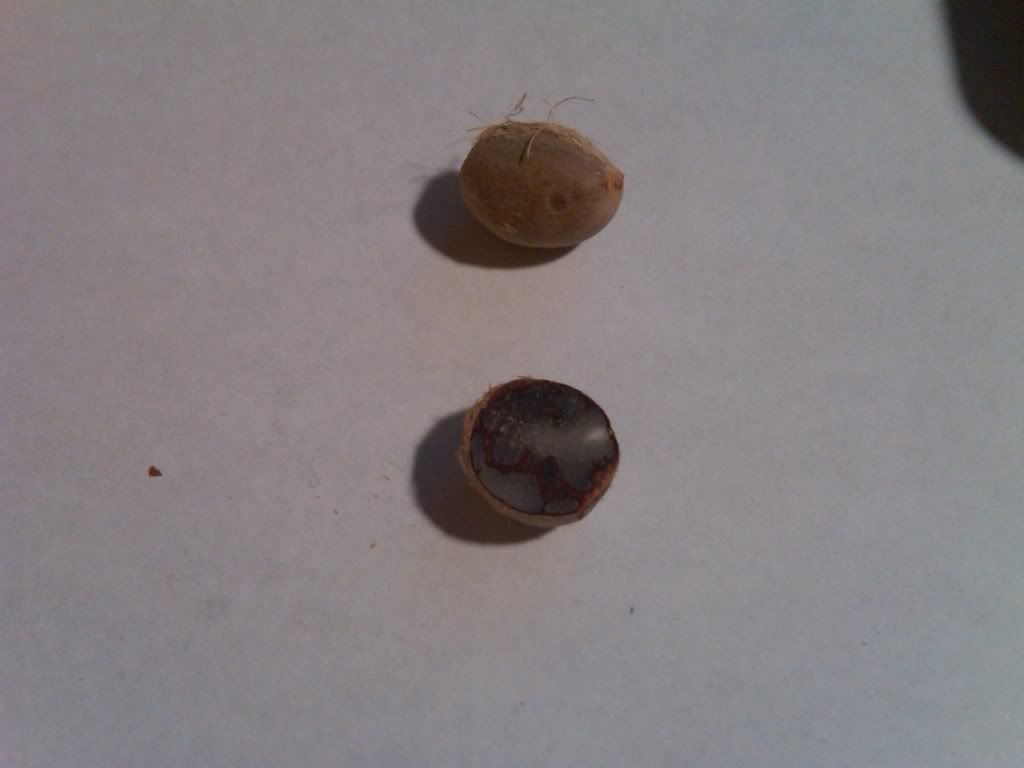
Butia eriospatha:
The embryo location would likely be the same for all Butias.
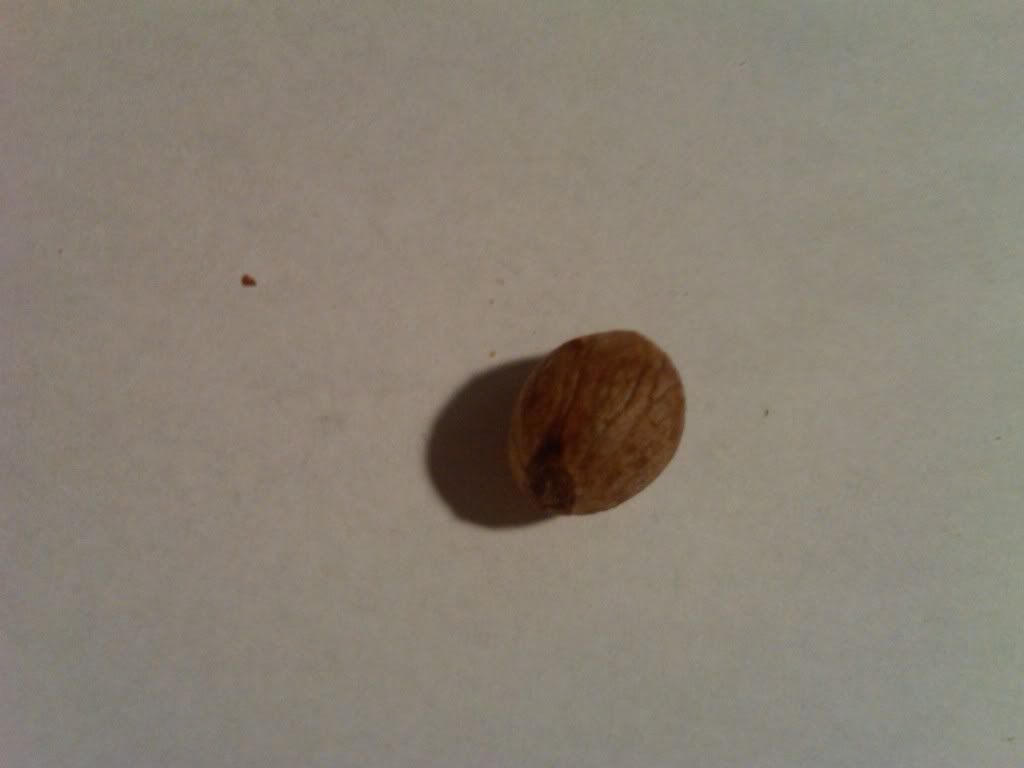
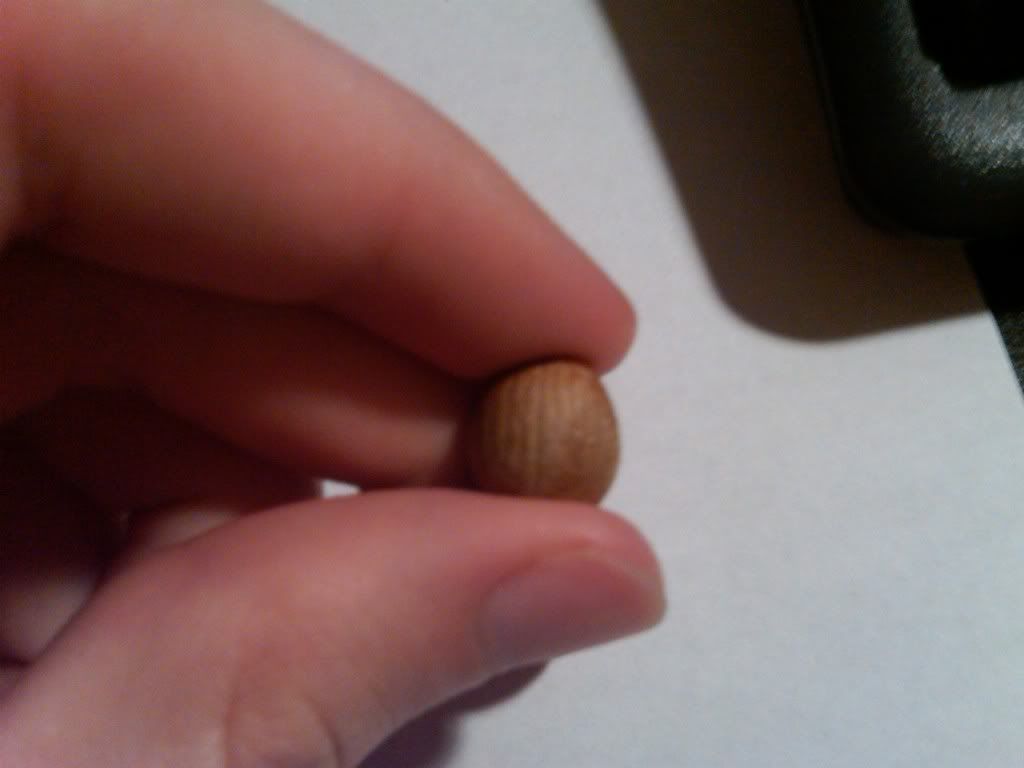
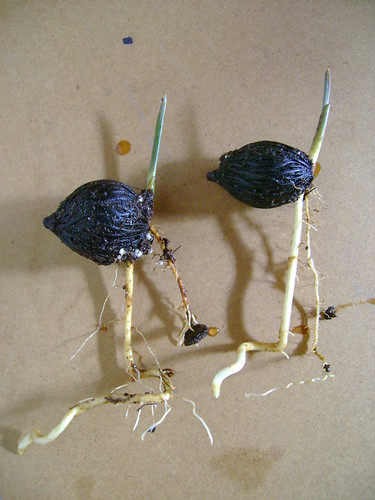
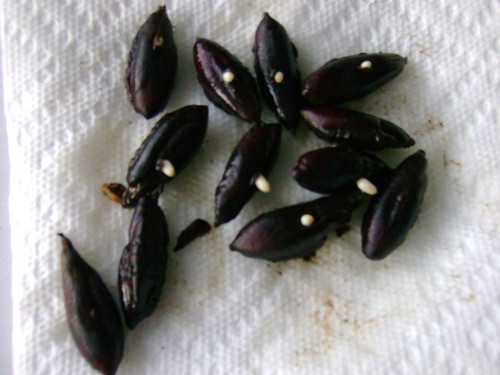
Butias are often known to produce "twin" germinations from the same seed. If you look at the pointed end of a Butia seed, you'll see three black dots. Here's one dot (blurry, right in the center):
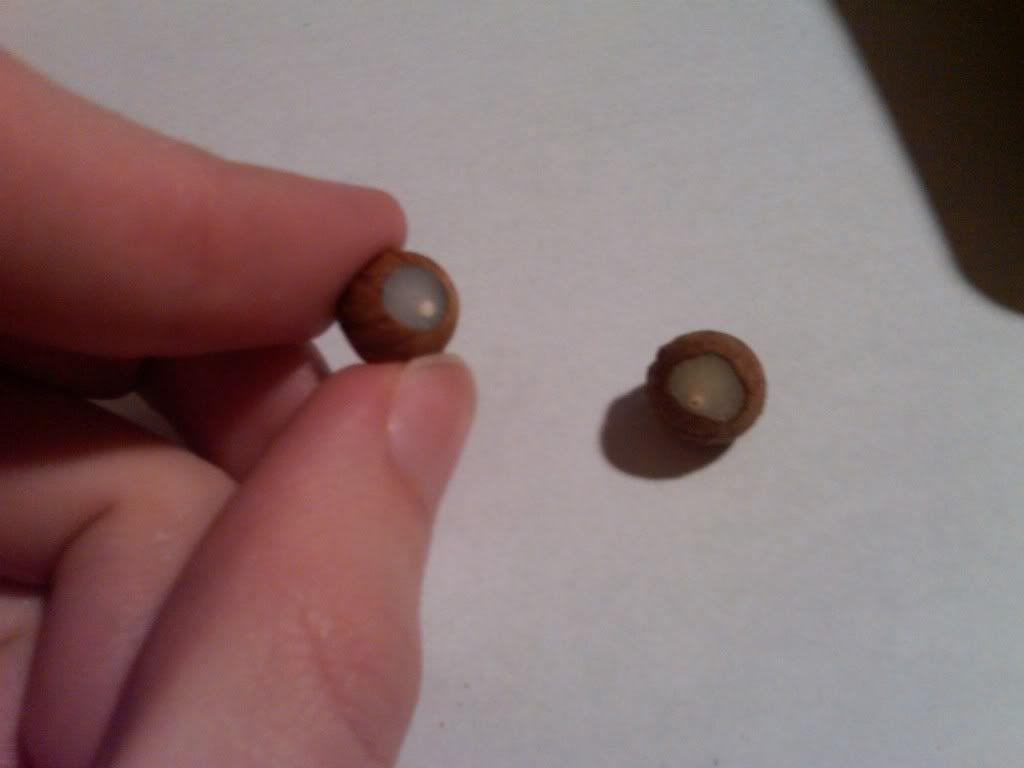
Behind each of those dots is a possible position for an embryo. In this case, there were 2 embryos in the seed:
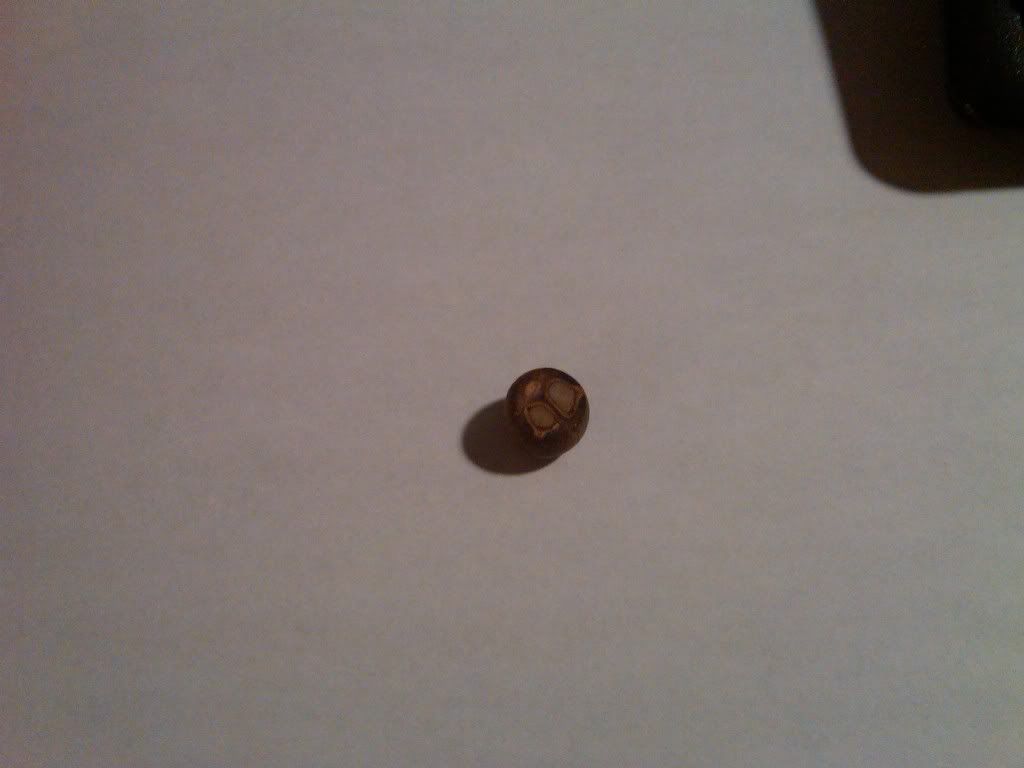
You want to de-lid the area around each dot:

Posted: Wed Feb 09, 2011 4:34 pm
by Cameron_z6a_N.S.
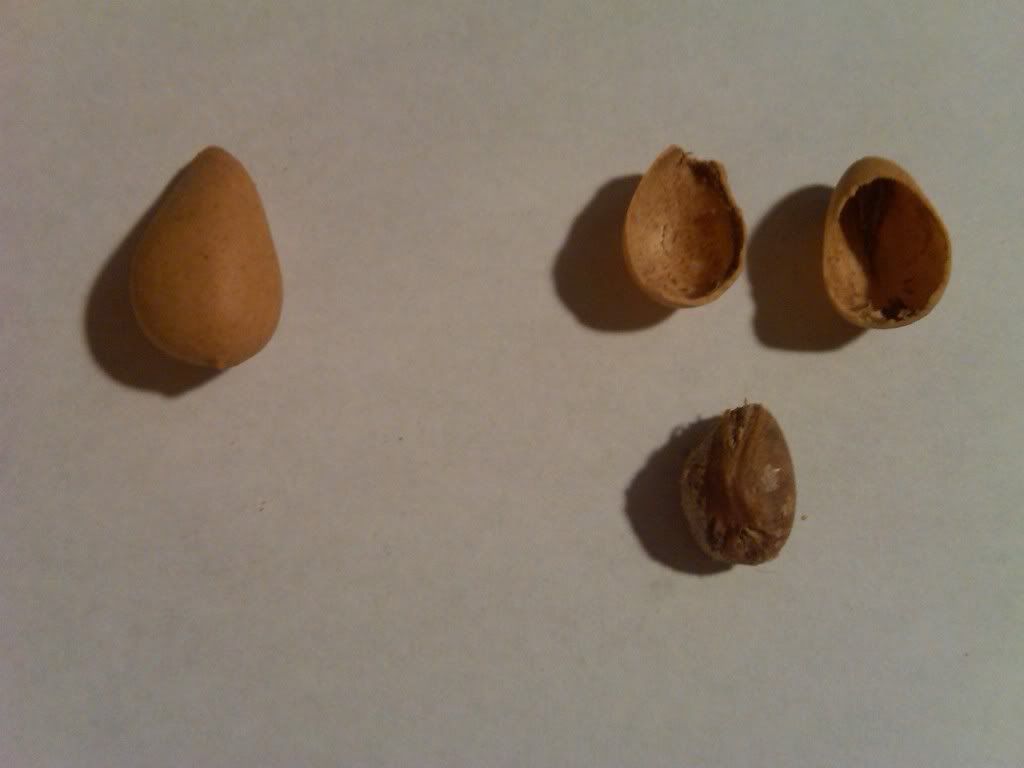
Rhapidophyllum hystrix (needle palm):
On the left is a whole seed. You'll want to gently crack the outer shell until you have the inner seed on the right. One side of the seed will have a kind of "seam" running down it. The embryo is located on the smooth side, under a small bump:
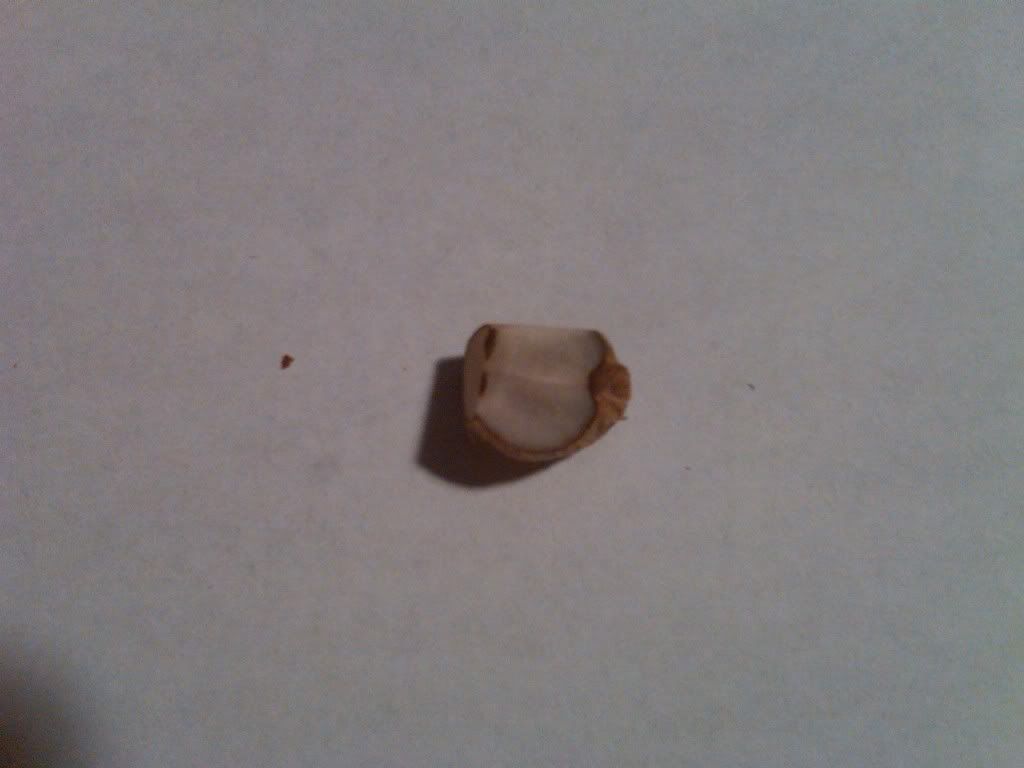
The embryo is the faint white line, right in the middle:
Posted: Wed Feb 09, 2011 4:36 pm
by Cameron_z6a_N.S.
Chamaerops humilis var. cerifera:
On the top seed, near the pointed end, is one dot. This is where the embryo is. The seed below shows the position:
Posted: Wed Feb 09, 2011 4:41 pm
by Cameron_z6a_N.S.
Trithrinax campestris:
There will be one end of the seed which is darker and more pointed:
On one side, there will be a "seam" which runs all the way down the seed. Really hard to see here, but it's basically in the center:
On the left side of the seam, near the pointed end, is the embryo. White spot on the bottom right:

Posted: Wed Feb 09, 2011 4:50 pm
by Cameron_z6a_N.S.
Nannorrhops ritchiana var. Kashmir:
This one was the hardest to figure out.
There will be a very small bump/dot at the end of the seed (the darker area right in the center of the seed in this pic):

The embryo is located beneath it:
Posted: Wed Feb 09, 2011 5:01 pm
by Cameron_z6a_N.S.
Sabal minor:
I didn't take any pics of this one.
There will usually be a flatter end of the seed. Sometimes this end will have a small mark from where the seed was attached to the flower stalk.
The embryo is on the opposite end, the rounder end.
Posted: Wed Feb 09, 2011 5:29 pm
by gpenny
Thanks for sharing the pictures! After my post earlier I messed around with the jubaeas and finally figured out where to sand. Still not sure if I went too deep or not deep enough. Will know by morning! I also studied the nannorrhops seeds and had a lot of difficulty seeing anything suggesting a spot to sand! After your post I will look again in the morning. Also delided a few Brahea armata so we will see how that goes.
Posted: Wed Feb 09, 2011 5:34 pm
by Cameron_z6a_N.S.
Good luck! The spots on the Nannorrhops are really hard to see, you'll probably have to view them under a lamp or something

Posted: Wed Feb 09, 2011 6:12 pm
by canadianplant
What kinds of seeds does this benefit?
Posted: Wed Feb 09, 2011 6:21 pm
by Cameron_z6a_N.S.
In this case it's palm seeds, although I did the same thing with canna seeds. It's especially helpful for tricky or long-germinating seeds, such as the needle palm and jubaea seeds.
Posted: Wed Feb 09, 2011 6:41 pm
by canadianplant
Just a way of letting moisture get in the seed?
Im going to have to scarify my canna seeds, and ive read that needle palms benefit from it too ( as youve said)
Posted: Wed Feb 09, 2011 7:27 pm
by lucky1
Excellent research Cameron.
Nannorhops ritchiana were the hardest for me to figure out. Seed looked the same at both ends for me.
Wodyetia bifurcata (Foxtail Palm), de-lidding would occur at the "
non pointy" end of seed (exactly at the end).
<img src="
http://farm5.static.flickr.com/4067/438 ... 045de6.jpg" width="375" height="500" alt="DSC03471" />
This topic is a wonderful resource, Cameron, to which everyone can refer in future for stubborn/long germinating seeds.
Thanks for doing it!
Barb
Posted: Wed Feb 09, 2011 8:04 pm
by lucky1
Cameron, this web page was done by Palms North's very own Steve (KNNN) several years ago.
Shows
Salacca wallichiana germinating, fitting into this topic. I think it's excellent work.
http://www.adjacentandremotegermination ... palms.com/
Barb
Posted: Wed Feb 09, 2011 8:24 pm
by Cameron_z6a_N.S.
that's a great link!
Posted: Wed Feb 09, 2011 8:30 pm
by lucky1
Yes, Steve has created precise and well-researched documents...wish I could find the rest of it.
Heck I'll just HOUND HIM to help out here.
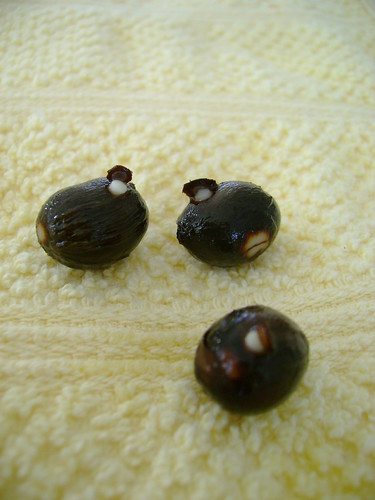
Medjool Date seeds. Also not at either end.
<img src="
http://farm3.static.flickr.com/2349/212 ... e03a2e.jpg" width="500" height="375" alt="DSC00720" />
Barb
Posted: Wed Feb 09, 2011 8:37 pm
by lucky1
NOTE: These 3 did not survive, so maybe de-lidding was incorrect.
Dypsis decaryi Triangle Palm
<img src="
http://farm3.static.flickr.com/2245/203 ... a140c4.jpg" width="500" height="375" alt="DSC00686" />
Posted: Thu Feb 10, 2011 5:35 am
by gpenny
Cameron
You may want to look at the needle palm seeds again. I had some in a baggie (no de-lidding) and I checked them this morning for signs of germination. One was putting out a root from the rounded smooth side (opposite the grove). I got to looking for the embryos on that side and found the more typical rounded dot just up from center towards the smaller diameter end of the seed. Could be wrong but it sure looked like it. You need to go deeper than normal on most seeds which may explain why their so hard to germinate!
Gayland
Posted: Thu Feb 10, 2011 9:12 am
by hardyjim
Barb
Are you sure those aren't peach seeds a few post's back?

Posted: Thu Feb 10, 2011 9:43 am
by Cameron_z6a_N.S.
Thanks gpenny, I'll take another look at them today!
Posted: Thu Feb 10, 2011 5:44 pm
by lucky1
Cameron, something's odd here: in your Sabal minor post of Feb.9, you say:
There will usually be a flatter end of the seed. Sometimes this end will have a small mark from where the seed was attached to the flower stalk.
The embryo is on the opposite end, the rounder end.
Wouldn't the opposite end of where it was attached to the inflorescence be the
sharp pointy end?
Or is this like Nannorhops ritchiana and I don't know which end is which?
At my age I need pictures...big pictures.
Barb
Posted: Thu Feb 10, 2011 5:48 pm
by Cameron_z6a_N.S.
Barb, there doesn't seem to be any sharp pointy ends on them!
I'm just taking my best guess by saying that's where it was attached. On the flatter ends of all of them there seems to be a very, very small mark/nick at the bottom, so that's what I guessed it would be.
Posted: Thu Feb 10, 2011 5:50 pm
by Cameron_z6a_N.S.
I've finally started to notice some germination of Cyathea dregi spores, but don't expect any pics for a few months at least!
The hardiness of this SA treefern hasn't really been tested well, but some sources report it to be hardy to -14 C !! Here's a pic of some:
http://commons.wikimedia.org/wiki/File: ... dregei.jpg
Posted: Thu Feb 10, 2011 6:00 pm
by canadianplant
Effin.... Sexy.........
Posted: Thu Feb 10, 2011 6:04 pm
by Cameron_z6a_N.S.
Those ones may look good, but right now all I have is some green fuzz, no more than 1 mm tall
Posted: Thu Feb 10, 2011 6:06 pm
by canadianplant
I never had luck with tree ferns. But i tried some random ficus, and i now have some weird green mass ( not fungus or mould), looks like scalloped leaves, like a small simple lettuce. I think im growing some weird random fern.
Posted: Thu Feb 10, 2011 6:32 pm
by Cameron_z6a_N.S.
yeah that sounds like a treefern. do they basically have 2 small round leaves?
Posted: Thu Feb 10, 2011 7:33 pm
by wxman
Have you tested washingtonia robusta?
Posted: Thu Feb 10, 2011 8:05 pm
by Cameron_z6a_N.S.
even though washingtonia seeds are relatively common, I've never tried any!! I want to get some from Truth or Consequences in New Mexico, they've survived some real cold temps.
Posted: Thu Feb 10, 2011 11:27 pm
by Dean W.
Never tried Tree Ferns before. Sounds interesting!
Posted: Fri Feb 11, 2011 5:14 am
by canadianplant
Ill have to take a pic. Since were on the topic.... ill make a new thread about it. The leaves are kind of scalloped, theres 2 or 3.
Would you really need to de-lid washys? They are very easy to germinate no?
Posted: Fri Feb 11, 2011 10:42 am
by wxman
canadianplant wrote:Ill have to take a pic. Since were on the topic.... ill make a new thread about it. The leaves are kind of scalloped, theres 2 or 3.
Would you really need to de-lid washys? They are very easy to germinate no?
They usually take a month or so for me. I picked a few hundred up when I was in Phoenix this week.
Posted: Fri Feb 11, 2011 11:06 am
by hardyjim
Washy seeds will germinate if you place them on the counter
while you take a shower-super easy,you may even see
roots in less that a week if they are fresh-
I would like to see some pics of your sporelings and
your method for getting them going.
I have a couple C.dealbata,C.australis that I started last
November-you can definitely not to forget to water these young'ins!
Great site for info on T.ferns-go to the bottom of the page to see all the listings
http://www.angelfire.com/bc/eucalyptus/ ... regei.html
Posted: Fri Feb 11, 2011 11:54 am
by Dean W.
I agree with, Jim. I would like to see some more pics...

Posted: Fri Feb 11, 2011 2:19 pm
by Cameron_z6a_N.S.
Jim, that's the site where I first heard of C. dregi
I've been using the germination method from another site, I posted some info on page 2 of this thread, here is what I posted:
"Canadianplant, I use 100% peat and cover it in boiling water. I wring out the water, and let it cool down a little. Then, I try to spread the spores evenly over the surface. TF spores are like dust, and as they develop, they're susceptible to mold, so I use the boiling water to try to kill all germs.
I keep them in the ziploc containers, not the bags. The main reason I do that is because I find with the bags the soil can shift a little bit, and since the tf spores are so tiny, I don't want them to move at all! I saw the first signs of germination after about a month, and the species was Dicksonia squarrosa.
I'm still waiting on 5 or 6 other types. The type I'm most hopeful about is Lophosoria quadripinnata, which is hardy to about -15 C, so it could probably make it here with minimal protection!
This website has been very helpful. It gives a step-by-step guide from harvesting spore, all the way to planting out the ferns:
http://www.thefernhouse.moonfruit.com/# ... 4524570707 "
It will be awhile before I can take any pics, as I plan to leave them in the sealed containers until they start to develop into plants that look remotely like ferns
I have all of them under a grow light right now. Here's what I'm trying:
Blechnum chilense
Blechnum magellanicum
Blechnum penna-marina
Cyathea dregi (germinated)
Dicksonia antarctica
Dicksonia squarrosa (germinated)
Lophosoria quadripinnata
Thyrsopteris elegans
Todea barbara
and an unknown species!
Cameron.
Posted: Fri Feb 11, 2011 9:02 pm
by TimMAz6
Nice job Cameron with all those seeds!!! Great stuff.
Posted: Fri Feb 11, 2011 9:09 pm
by Cameron_z6a_N.S.
Thanks Tim! Have you started any that I sent you?
Posted: Sat Feb 12, 2011 10:25 am
by lucky1
Chamaerops humilis seed.
Wasn't sure where to sandpaper, but the process was sufficient to allow water to enter.
A little brown "trapdoor" suddenly opens with the "button" emerging. Here they are:
<img src="
http://farm6.static.flickr.com/5058/543 ... 4ce419.jpg" width="375" height="500" alt="DSC04456" />
The following shows "lost cause" Pritchardia hillebrandii seeds.
Damn...these were expensive.
All appear to have a dead embryo, no trace of white interior anywhere = obviously old seeds

<img src="
http://farm6.static.flickr.com/5057/543 ... 72c570.jpg" width="500" height="375" alt="DSC04455" />
Barb
Posted: Sat Feb 12, 2011 10:28 am
by Dean W.
Neat, I guess I'll have to try the sand paper method. I have some Queen palm seeds I'm dealing with now.

Posted: Sat Feb 12, 2011 2:41 pm
by Cameron_z6a_N.S.
Nice work with the chamaerops, Barb! Did you try cutting one of the Pritchardia seeds in half? Sometimes it's easier to find the embryo that way.
Posted: Sat Feb 12, 2011 5:48 pm
by lucky1
I only had 4 Pritchardia seeds left, and was reluctant to "ruin" any
But shouldn't that "endosperm" be 99% fleshy and white if it's the food supply for root development up to and including first leaves?
OK gonna cut one in half.
